Today, modern apartments, whether in new or old buildings, have an intercom for the entire staircase, which also functions as doorbells to let the occupant know that they have visitors. However, quite a few tenants still use doorbells. There is a large variety of types of such devices, they differ both in functionality (melody selection, video communication, etc.), as well as the method of connection. In this article the principles of the device and connection diagram, methods of repair and installation of a new bell will be discussed.
Contents
How does the doorbell in the apartment work?
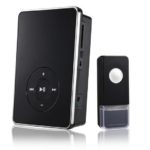
There are two large types of electric doorbells: wireless and wired. In the case of a wireless device, everything is quite simple - the power is supplied by rechargeable batteries (in the bell and the activation buttonThe activation button sends the signal to the master device.
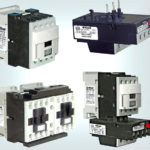
With wired calls, the case is more complicated, because of the presence of wires and their proper switching. The basic type of such devices is connected to the mains 220 V. The principle of operation of such a device is not complicated and is similar to how a light switch-lamp combination works. When you click on the button, the contacts are closed and the power goes to the device alerts and that starts to work: in electromechanical devices anchor attracted to the core and a special hammer hitting a metal cup creates the sound, in electronic devices, the speaker begins to play a predetermined tune.
Installing the doorbell with your own hands
For an experienced installer or someone who knows at least a little bit about electrical installations, installing a doorbell is not difficult. In general, here you need to know what the principle of a normal light switch. The only difference is that instead of a key switch button is used.
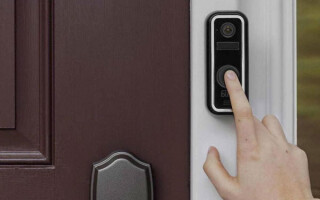
To install the doorbell, you must first choose a place behind the door where it will be installed, or use the existing place of the old bell and its wires. After selecting the location, the wiring process itself is carried out:
- For a newly installed doorbell: a hole is made in the wall for routing the cable to the electrical panel, the cable is laid (в Stroe or cable duct) from the main device to the activation button and to the fuse box in the apartment or junction box, and connected according to the diagram below.
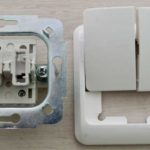
- To install a new device in the old place, everything is much easier: the old device and the button are removed, the new power button is connected to the wires from the old one behind the door. Next, the main alarm device is removed and the new device is installed in its place. Make sure that the new device has the same voltage rating as the old one.
Important! All work must be carried out with the power supply disconnected! Observe the electrical safety regulations for electrical work!
How to disconnect and dismantle the old doorbell
Most often, a new electric doorbell is installed in place of the old one. To do this, you need to carry out the dismantling of the installed device. There is also nothing complicated about this. To begin with, the power is turned off. It is best to turn off the power in the whole apartment, if you do not know exactly through which automatic switch the doorbell is powered. After the power is removed from the bell, dismantle the old PA device in the apartment by disconnecting both conductors (zero and phase), as well as dismantle and remove the doorbell button. In their place shall be installed a new bell of the same type (voltage), or, in the absence of such and if you want to remain without a doorbell, bare wires carefully insulated.
Wiring diagram for the bell
The wiring diagram of a 220V wire bell looks as follows (the same way in most cases are connected the old electric bell from the builder):
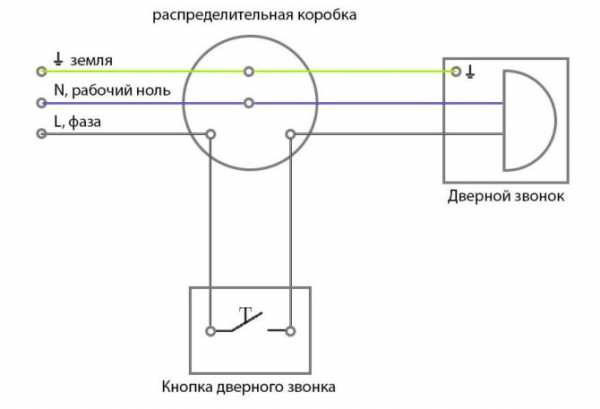
To the junction box from the switchboard the electrical cable with three conductors (zero, phase and ground) is routed to the junction box. To the same junction box is laid three-core cable from the location of the main unit of the bell. Next, from the location of the doorbell button pull a two-core cable to the box.
After all the cables are laid, the conductors are connected. Grounding conductor and zero from the electrical panel are connected to the same terminals from the main unit of the bell. The phase from the power supply is connected to one conductor from the button, and the phase to the main unit is connected to another conductor from the same button.
Be sure to carefully insulate bare wires in the junction box with electrical tape, heat shrink tubing, or or using special PPE caps..
Checking the work and the reasons why the bell may not work in the apartment
When connecting an electric doorbell it is difficult to make a mistake, but it happens. It also happens when the correct connection does not work the bell (it may be due to a defect in the product or lack of power). To check the performance of the device and identify the reasons why the bell may not work, it is necessary to make a diagnosis consisting of the following steps:
- Turn on the power and check if the bell works.
- When the power is on, use a tester to check the voltage on the main unit and on the power button of the bell.
- With the power off, use a probe or multimeter to test each conductor to determine the continuity of the circuit.
- If the conductors are okay, check for good contact in the bell button.
- If, after testing the continuity of the wires and the electrical continuity of the electrical circuit connection scheme, the defect persists, then there is a manufacturing defect: return the bell back to the store and buy a new device.
In the case of a wireless device, the cause of malfunction may be due to improper battery installation, as well as non-compliance with the communication range instructions of the main unit and the button. Check that the pluses and minuses of the battery and the socket are the same, and also check the installation range.
Related articles: