Installing underfloor heating is a great solution for comfort in the bathroom or any other room. Coordinated work of all units of the system ensures durable and safe use of infrared underfloor heating. The thermostat is an indispensable device that automatically regulates the temperature of the floor surface.
Contents
General principles of connecting thermostats to the floor heating
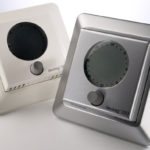
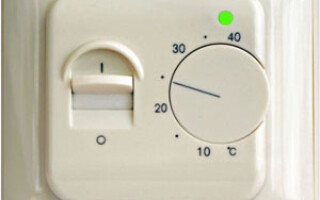
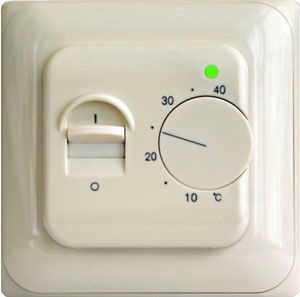
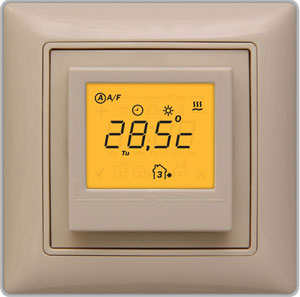
Thermostats come in different types: mechanical, electronically controlled, with a touch panel or with a conventional knob. Their connection principles are similar, despite their external differences.
Choosing the optimal installation location for the thermostat
A dry wall that is not exposed to drafts and direct sunlight is the best place to install thermostat .. Connection to electricity will be easier if there is a socket nearby. Height of installation of the device depends on the desire and convenience of the consumer, usually 0.4 - 1.7 meters from the floor.
The controller is installed in two ways to choose from:
- Built-in - A cavity is hollowed out in the wall for the supply cables, and the thermostat body, placed in a mounting box, is embedded in the prepared hole;
- Wall-mounted - the wires and the thermostat are placed outside. In this case, the integrity of the wall at the place of attachment of the device is not violated.
TIP! The sensor cable going to the thermostat from the floor heating in the first variant is conveniently laid in a metal-plastic pipe, but not in corrugated tube. If the device will fail, it can be easily replaced.
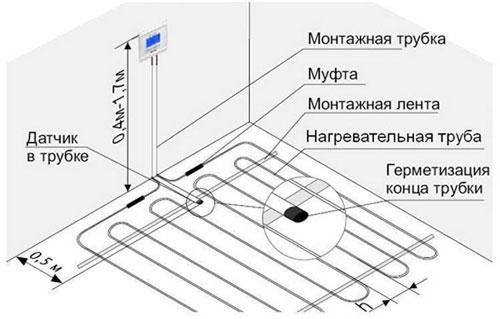
Diagram of connection of wires to the thermostat
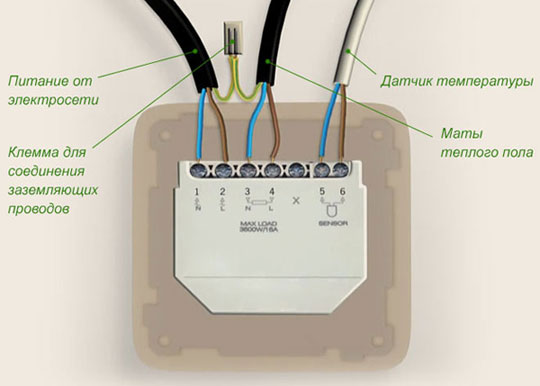
The thermostat is designed as a square box with connectors. The manufacturers indicate the wiring diagram on the back cover of the device and it is not difficult to understand it, because the terminal blocks are numbered:
- Nos. 1, 2 - for power wires;
- Nos. 3, 4 - for the wires coming from the heating mats;
- №№ 6, 7 – temperature sensor.
The alphabetical marking of the connectors means:
- L - phase (for white, black or brown cables);
- N - neutral (blue).
There are three steps to connecting the wires to the thermostat.
- The mains wire is connected:
- The phase wire L is brought to socket 1;
- The wire N, zero, is connected to socket 2.
- heating cable connection:
- in terminal 3, the neutral N wire is inserted;
- in terminal 4 - phase L.
- the temperature sensor is connected without observing the polarity to the sockets 6 and 7.
Setting the thermostat
Common thermostat models are equipped with a software module that sets the desired floor temperature for any time period. The touch screen allows this procedure to be done with a few keystrokes.
The "up" and "down" keys set the desired temperature manually after the unit is turned on.
The automatic adjustment settings will take some time.
Setting the date and time.
On the panel there is a button "book", within 5 seconds you need to hold it down simultaneously with the arrow "up". A menu opens in which you can set both the hours and the days of the week (designated by digits from 1 to 7). The "power" button saves the selected option.
Adjusting the heating by day and hour
The settings menu is activated by clicking on the "book icon" for 5 seconds. In the basic time interval settings, weekdays come first. The options are selected by pressing the "book button", the time is selected by pressing the "up" and "down" keys. The setting cycle repeats in this sequence: day of the week - time - temperature. The setting can be adjusted by dividing the day into 6 segments:
- up;
- left the house;
- returned at lunchtime;
- left lunchtime;
- returned in the evening;
- night mode.
Service menu settings
Activated when the unit is switched off by pressing the "on" and "booklet" buttons. The service menu can be used to configure:
- Sensor calibration;
- Sensor switching or simultaneous activation;
- Temperature limitation;
- Temperature step adjustment (By default, the step of switching on and off the floor is 1 degree.);
- Minimum heating mode;
- Maximum heating;
- Reset settings.
Child mode
The thermostat screen can be protected from accidental pressing by connecting a lock. Pressing the up and down keys simultaneously for 5 seconds secures the controller against unauthorized switching.
Faults
The reliability of thermostats depends on the quality of the components from which the devices are made.
Typical malfunctions:
- Mechanical damage is a common breakdown for devices of low price category. Careless handling leads to failure of the buttons, wheels and front panels.
- An important part of the thermostat is the contact relay, which is limited by the number of on/off cycles. Over time the part wears out and the power is no longer supplied to the heating cable;
- Power surges in the electrical system are guaranteed to put the electronic "stuffing" of the controller out of operation;
- Incorrect connection of the device can lead to a short circuit and damage to the device.
Connecting underfloor heating without a thermostat
It is theoretically possible to connect the floors to electricity without using a thermostat, but this solution is unjustified for several reasons:
- The risk of overheating the system - there is no control over changes in the temperature of the heating film, which is heated to the maximum operating temperature, and this is not less than 60 °C. Flooring, regardless of species, becomes a heat accumulator and increases the temperature of the heating elements by an additional 10-15 degrees.
- Continuous operation under the influence of high temperatures shortens the service life of the product and leads to its failure;
- The need for constant monitoring - to prevent the problems described above, the floor heating will have to turn on and off manually, which does not ensure its comfortable operation;
- Increased energy consumption - constantly running system leads to additional loads in the power grid and unreasonable consumption of electricity;
- Discomfort in use - associated with the heating of the used floor covering. For example, tiles Has a low thermal conductivity. Its surface can be heated to the maximum possible temperatures provided by the characteristics of the system;
- Overheating of the flooring - entails additional costs for repairs, as in the process of use of the elements of laminate and hardwood floors, linoleum fading and warping. Carpet releases volatile toxic substances, tile adhesive is destroyed by temperature changes.
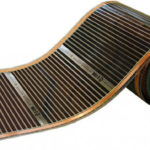
Attaching infrared underfloor heating foils
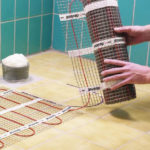
Installation of infrared film flooring - the process is laborious, but does not require special skills.
IMPORTANT! It is necessary to read the instructions carefully: each manufacturer has its own requirements for matting and system installation, as well as recommendations for the use of substrate and RCD - protective disconnection device.
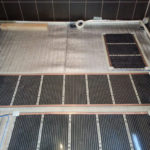
The design of the infrared floor heating includes a film heater, which is produced in rolls and has an average thickness of up to 2 mm. Inside the film, between the copper cores are strips of carbon, which are heated by the electric current flowing through them. On the mats manufacturers put dotted lines indicating the cut line. Cutting should be made taking into account the furniture standing in the room: they do not lay a warm floor under it.
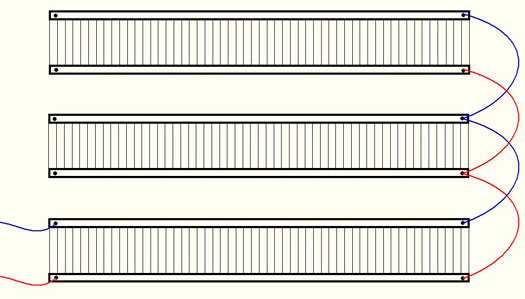
Strips of film are placed on the floor so that they do not touch each other. Some manufacturers recommend laying mats overlapping, maintaining a distance between adjacent bars of not more than 1 cm. They are fixed with double-sided adhesive tape, which must be removed after the installation work.
Order of work:
- Laying the substrate around the perimeter of the room - in its reflective surface should be excluded the use of metals;
- Distribution of mats taking into account the geometry of the room with a distance of 5-7 cm from the walls;
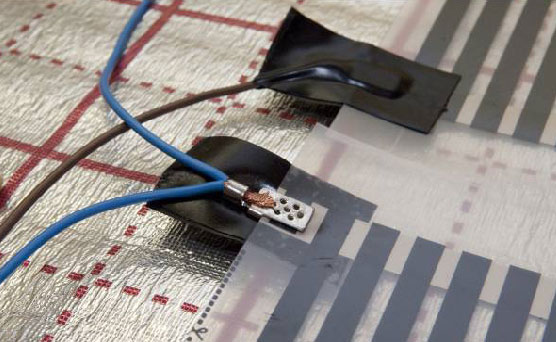
- Installing the fasteners for the power supply - these are special clips in the form of plates connected at an angle. One plate is inserted into the cavity under the lamination and applied to the copper core. The other uses pliers to crimp it from the other side;
- Connection of wires - it is recommended to use two-color wires. The connection scheme - parallel, that is, the wires are placed on one side. It is obligatory to check their tight fixing in the contact clamps and insulation with liquid rubber, which is included in the kit;
- Waterproofing of the live parts, to which the terminal with the wires will not be connected;
- Inserting the thermostat sensor under the heating elements;
- Connection of the thermostat;
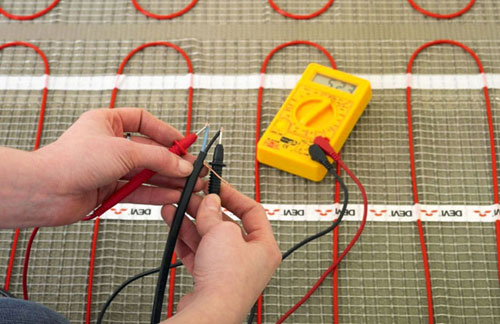
- Test connection of the underfloor heating, checking each element for heat.
Conclusion
The absence of a temperature sensor in the scheme of the floor heating leads to malfunctions in the use of heating elements and the inevitable material costs. This device is an important structural component in the system of floor surface heating.
Related articles: